How to Estimate Dirtwork: A Step-by-Step Guide for Small Contractors
If you’ve been in the excavation or site prep business for any length of time, you know that dirtwork estimating is where bids are won and where margins are lost. Underestimate a cut and fill job and you’re eating the difference. Overestimate and you lose the contract to someone who did their homework.
The good news: dirtwork estimating is a learnable skill. It follows a consistent process, and once you understand the steps, you can build estimates you’re confident in on job after job.
Here’s how to do it.
Step 1: Get the Right Plans and Specs
Before you touch a number, make sure you have the documents you need:
- Grading plan — shows existing and proposed elevations, cut and fill areas, and drainage patterns
- Soil report (if available) — tells you what you’re dealing with below the surface
- Project specifications — outlines compaction requirements, material standards, and any special conditions
- Utility plans — you need to know what’s in the ground before you dig
If you’re bidding a job without a grading plan, you’re guessing. That’s fine for small residential work you can walk yourself, but for anything larger, get the plans.
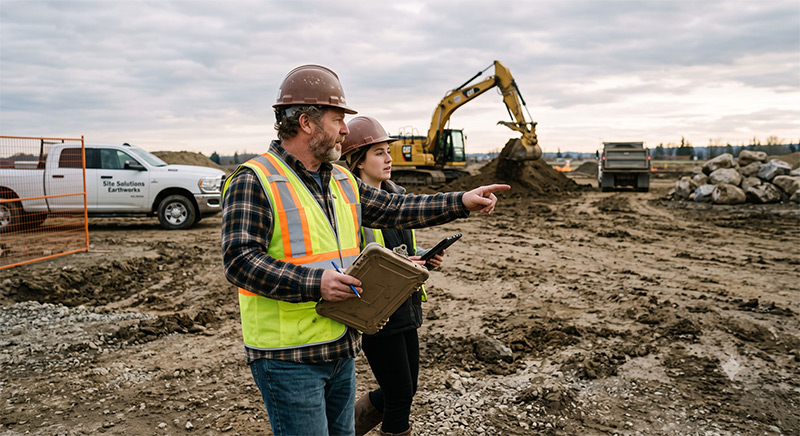
Step 2: Understand the Site Conditions
Walk the site before you estimate it. Plans tell you a lot, but they don’t tell you everything:
- Existing vegetation — how much clearing and grubbing is involved? Mature trees cost more to remove than scrub brush.
- Soil conditions — is it sandy loam, clay, or rock? Clay cuts slow, compacts firm, and swells when excavated. Rock changes everything.
- Site access — can a full-size excavator and tri-axle trucks get in and out cleanly, or is access tight?
- Drainage — where does water go during construction? Poor drainage means delays, which means money.
- Existing structures — are there old foundations, buried debris, or underground tanks? These are scope killers if you don’t find them first.
A 30-minute site visit can save you from a $20,000 mistake.
Step 3: Calculate Your Cut and Fill Quantities
This is the core of any dirtwork estimate. Cut is dirt you’re removing; fill is dirt you’re adding. The goal is to figure out how much of each you have.
The basics:
- Pull the existing and proposed grades from the grading plan
- Calculate the volume of material to be moved in cubic yards (CY)
- Common methods include the grid method and the average end area method
Don’t forget swell and shrinkage:
- When you excavate soil, it expands (swells) — typically 10 to 30 percent depending on soil type
- When you compact fill, it shrinks — bank measure does not equal compacted measure
- A bank cubic yard of common earth becomes roughly 1.25 loose CY in a truck, and compacts back to about 0.90 CY
If you ignore these factors, your haul quantities and fill volumes will be off — sometimes way off.
On-site vs. off-site material:
- Ideally, your cut material can be used as fill elsewhere on the site (mass haul). This saves you import and export costs.
- If you have excess cut, you’ll need to haul it off. Factor in trucking and disposal fees.
- If you’re short on fill, you’ll need to import. Factor in material cost plus delivery.
Step 4: Estimate Equipment Hours
Once you know your quantities, figure out what equipment you need and how long it’ll take.
Common equipment for sitework:
- Excavator (for digging, trenching, demo)
- Dozer (for spreading and rough grading)
- Motor grader (for fine grading)
- Compactor (sheepsfoot for subgrade, vibratory drum for base)
- Scrapers (for large open sites with long haul distances)
- Dump trucks (for material hauling)
Production rates vary widely by equipment size, soil type, and operator skill, but here are rough starting points:
| Equipment | Typical Production Rate |
|---|---|
| Excavator (20-ton) | 150 to 300 CY/hour |
| Dozer (D6) | 200 to 400 CY/hour |
| Dump truck (14 CY) | 4 to 6 loads/hour (cycle time dependent) |
Calculate: Quantity divided by Production Rate equals Equipment Hours. Then add buffer for mobilization, moves between areas, and setup time — typically 10 to 15 percent.
Step 5: Price Your Equipment
For each piece of equipment, you need an all-in hourly cost. This includes:
- Ownership costs (depreciation, interest, insurance) if you own it
- Operating costs (fuel, oil, maintenance, tires, and undercarriage wear)
- Operator wages plus burden (payroll taxes, benefits, workers’ comp)
If you’re renting, use the rental rate plus delivery and pickup, and add your operator separately. Don’t just use the rental rate and forget the operator. That’s a common mistake that blows up labor budgets.
Step 6: Add Trucking Costs
Hauling is often one of the biggest line items on a sitework job. Factor in:
- Number of loads — based on your swell-adjusted loose volume and truck capacity
- Cycle time — load time plus haul distance divided by speed, plus dump time and return
- Number of trucks needed to keep the excavator or loading equipment productive
- Disposal or material costs — tipping fees for unsuitable material, cost of imported fill or aggregate
A truck sitting in line waiting to load is a truck costing you money without producing anything. Size your truck fleet to match your loader’s output.
Step 7: Calculate Subgrade and Compaction Work
Most site grading specs require compaction to a certain density — commonly 95 percent of modified Proctor. Price this out:
- Number of passes required by equipment type
- Moisture conditioning if soil is too dry or too wet
- Proof rolling and any soft spot repairs (carry a contingency for this)
- Testing costs if required by spec
Step 8: Don’t Forget the Indirect Costs
This is where a lot of small contractors leave money on the table. Your estimate needs to include:
- Mobilization and demobilization — getting equipment to and from the site
- Erosion control — silt fence, inlet protection, seeding (often spec’d and inspected)
- Dewatering — pumps, discharge lines, permits if needed
- Surveying and staking — who’s setting grade stakes?
- Project management time — your time has a cost
- Bonds and insurance if required by the contract
Step 9: Apply Overhead and Profit
Once you have your direct costs totaled, apply your overhead markup and profit margin.
A common mistake is treating profit as an afterthought — something left over after everything else. It’s not. It’s a line item you build in from the start.
- Overhead covers your fixed costs: office, truck payments, insurance, admin staff, software subscriptions, and so on. Know your overhead rate as a percentage of revenue.
- Profit is what you pay yourself for risk and what grows the business. Don’t work for free.
If you don’t know your overhead rate, that’s a separate problem worth solving. As a rough starting point, many small sitework contractors target 10 to 20 percent combined overhead and profit on top of direct costs.
Step 10: Review Before You Submit
Before the bid goes out:
- Check your math — quantity takeoffs and arithmetic errors are common and costly
- Re-read the scope — make sure you haven’t missed a spec item or included work that isn’t yours
- Check the schedule — are there liquidated damages? Can you actually complete the work in the time allowed?
- Know your assumptions — write them down so you can defend your number if the owner pushes back
The Bottom Line
Dirtwork estimating isn’t guesswork. It’s a process. Site conditions, accurate quantity takeoffs, realistic production rates, and fully loaded cost rates are the foundation. Miss any one of them and your bid is built on sand.
The contractors who win jobs at the right price and actually make money when they finish are the ones who follow a consistent process every time, whether the job is $20,000 or $2 million.
Estimating software built for contractors can help you move through this process faster and with fewer errors. If you’re still running bids on spreadsheets, it might be worth seeing what a purpose-built tool can do for your workflow. Check out ProfitDig and start for free.
Stop losing profit.
Build bids in minutes and track every dime with ProfitDig.
Start Risk-Free30-Day Money Back Guarantee